Growing cannabis indoors can be highly rewarding. You can enjoy the satisfaction of watching your seedlings transform into mature plants and the accomplishment of harvesting a rich, potent crop.
But growing cannabis also comes with its share of challenges. Without the right strategy, cannabis growers might find themselves with disappointing yields and low-quality products.
So, if you’re interested in indoor cannabis cultivation, there are some important steps you should know before you start.
Get started with your indoor cannabis cultivation project today
Understanding the Basics of Cannabis Indoors Growing
Legal cannabis growing operations are still a relatively new phenomenon in the United States.
The industry is just beginning to find its place as a legitimate player in the market. But cannabis has a strong foothold in many states, whether for recreational or medical use. And as more states rally for legalization, we can expect the demand for cannabis products to increase in coming years.
Growing high-quality product is essential for the canna business to thrive. And while outdoor grows are still favored by some, you simply can’t beat the control of an indoor growing operation.
From selecting strains to harvesting buds and everything in between, it’s important to understand the basics of cultivating cannabis indoors before you start your growing endeavors.
Initial Setup for Cannabis Indoor Growing
Your grow space is arguably the most important part of growing cannabis indoors. Too little room and your plants will be crowded, resulting in less growth. Too much room and growing conditions like temperature and humidity may become harder to regulate.
Finding a facility with the right amount of space for your efforts will result in streamlined operations and ultimately a better product. A grow tent might be fine for amateur home growers but serious, commercial growers need serious grow space.
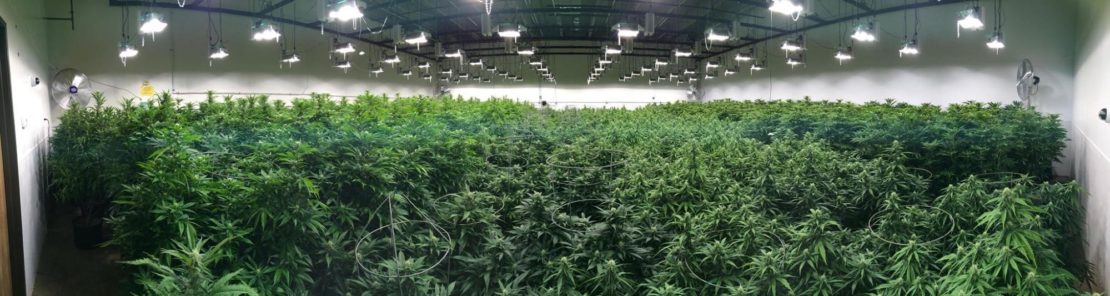
While it’s possible to convert an existing space into an indoor grow room, commercial growers can also choose to build a custom cannabis greenhouse from the ground up.
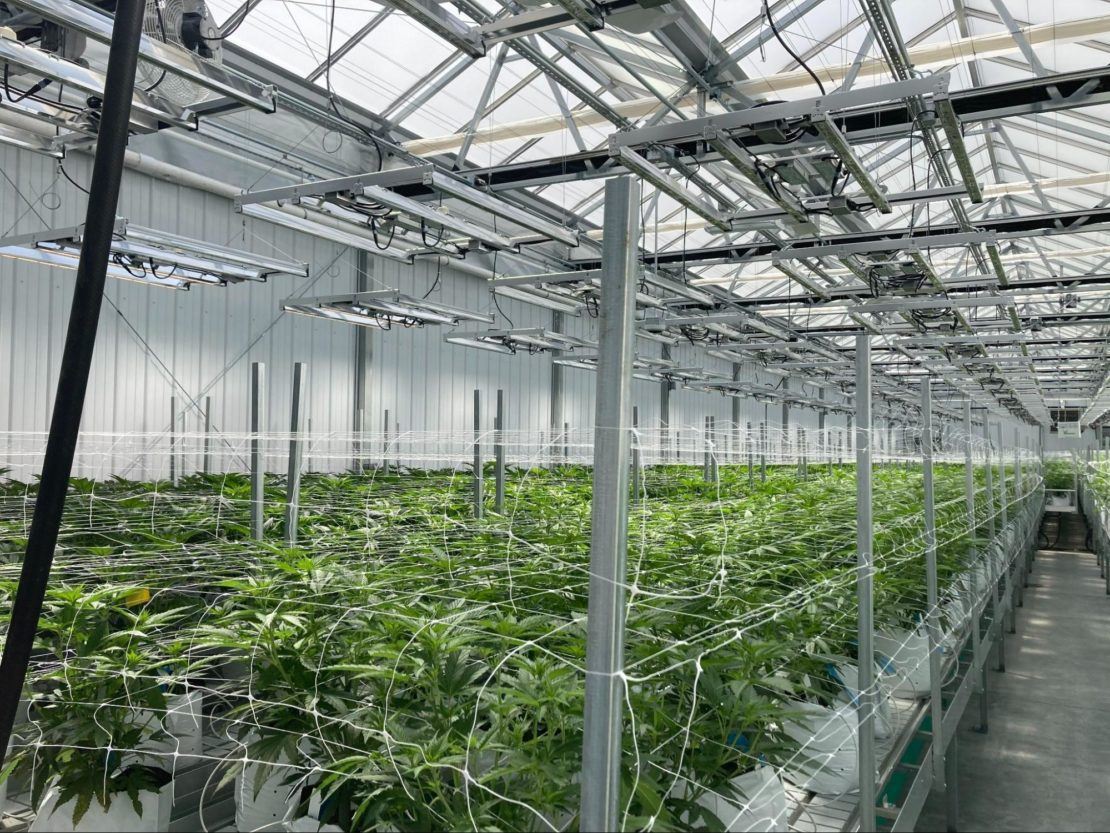
A well-designed cannabis greenhouse allows you to control every aspect of the growing environment. With ample room for plants to grow and integrated controlled environment agriculture (CEA) systems, a custom cannabis greenhouse promotes higher yields and a more potent product.
At Prospiant, we can provide you with all the expertise you need to create a commercial greenhouse optimized for cannabis plant growth.
We’ll connect you with all the technology-backed systems you’ll need to grow cannabis indoors. From lighting and irrigation to temperature and humidity, you’ll have total control over the conditions in which your crops grow.
Prospiant’s in-house specialists have a deep knowledge of the cannabis industry and are committed to building the best custom greenhouse solution for you. Our experienced contractors will help to expedite the zoning and permitting process so you can start growing cannabis sooner. From systems monitoring to emergency repairs, Prospiant will be with you every step of the way.
Select the Right Seeds and Get Them Germinated
Once you’ve determined the right grow space for your indoor cannabis operations, it’s time to decide which strain (or strains) you want to grow. There are countless varieties of cannabis strains available to choose from, varying in appearance, potency, and personality.
Maybe you want the cerebral and energizing effects of a sativa. Maybe you’re after the relaxing feeling of an indica variety. Or maybe you want to grow a hybrid strain that combines aspects of both.
Some of the most popular strains for indoor growing include:
- Blue Dream
- Banana Kush
- White Widow
- Girl Scout Cookies
- Afghan Kush
For growers who are relatively new to indoor cannabis cultivation, indica strains are usually recommended. Indica dominant cannabis varieties tend to flower faster and take up less space than sativas.
It’s perfectly acceptable to grow multiple strains of cannabis in the same grow space, but you’ll need to account for different rates of growth and potential size differences of mature plants.
Specializing in one good indica strain is probably the safest bet for new growers looking to gain experience. But there’s also the matter of choosing feminized or non-feminized seeds.
Feminized vs. Non-feminized Seeds
Cannabis is a fascinating species that can produce both male and female plants. Only female plants can reliably produce the THC-rich flowers from which cannabis products are made, making male plants a waste of valuable resources for growers. This creates an interesting dilemma for growers when they choose their seeds.
Feminized
Feminized seeds are almost certain to grow exclusively female plants. This can reduce the workload for growers looking to eliminate unwanted male plants and pesky pollen from their crops. Feminized seeds are a great option for indoor commercial growers who want the most cost-effective plants with less hassle than regular seeds.
Autoflowering
Autoflowering seeds are a great choice for less experienced growers. These seeds can transition from the vegetative stage to the flowering stage without the necessary change in light cycle that other seeds require, hence the name “autoflowering”. Harvest times are usually faster than other types of seeds and can help to optimize operations in smaller spaces.
Regular
Regular cannabis seeds can be the most challenging to grow but present unique breeding opportunities. There are a wider variety of cannabis strains available as regular seeds than autoflowering or feminized varieties. Plants grown from regular seeds are often more suitable for cutting clones and creating a pollen bank.
While growing healthy plants from regular seeds will require more work, an even parity between male and female plants allows ambitious growers to experiment and cultivate their own unique strains.
Whichever type of seed you choose for your operations, there are few characteristics to look for when selecting cannabis seeds. You’ll want to find seeds that are:
- Dark
- Dry
- Hard
- From a Reputable Supplier
Germination
Now that you’ve chosen the perfect seeds for your cannabis greenhouse, it’s time to germinate them. There are several approaches to cannabis seed germination that you can take.
Small-scale cannabis growers will usually wrap their seeds in a damp cloth left in a dark cupboard for a few days to start the germination process. But professional commercial growers need to take a more scalable approach.
Assuming that you’ve managed to get high-quality cannabis seeds, you should have a relatively good germination success rate. And if you’ve invested capital into obtaining great seeds, you’ll want to ensure that as many of those seeds germinate as possible.
While there is some wiggle room in the way you choose to germinate your seeds, there are some tried and true steps you can take for optimal germination. You’ll need some professional-grade equipment and supplies but the results will be worth it.
Germination supplies you’ll need include:
- Distilled Water
- Peroxide Solution
- Iso Alcohol
- pH Meter
- Coco Coir
- Test Tubes
- Yeast Caps
- Plastic Containers with Lids
- Tube Holder
- Plastic Pipette
Step One
First, make sure that every surface and piece of equipment is sterile. Organize all your supplies in one space, review your germination procedure, and be sure to clean up as you go.
If you’re interested in building a completely custom cannabis growing operation, you might want to include a clean room in your plans specifically dedicated to caring for seeds. Otherwise, just try to keep your working environment at its cleanest. A standard 91% alcohol solution works well for any necessary sterilization.
Step Two
Sterilize your distilled water by bringing it to a boil. Be sure to let the water cool to room temperature (you don’t want to cook your seeds!) and then proceed to wipe any dirt or debris from your seeds and cover them in cooled distilled water to soak.
You may want to introduce a nutrient solution into the soaking water at this stage. There are many different mixtures you can try, most of which include calcium, magnesium, and beneficial microbes. Whatever nutrient solution you choose, make sure the pH is as close to 6.0 as possible.
Step Three
Now, let the seeds soak in water for 48 hours. Sterile plastic containers with tight-fitting lids are great for the soaking stage.
Assuming that all of your supplies, surfaces, and equipment have been sterilized, you can proceed to the next step.
Step Four
Place a small amount of coco coir into each test tube, about a half inches worth at the bottom. You can use a push rod or feeding tube to ensure that the walls of the test tubes stay clean throughout the process.
Give your seeds a quick dip in a 3% peroxide solution, no longer than fifteen seconds. Any further soaking after fifteen seconds can damage the seeds, but this preliminary sterilization is necessary to ensure no foreign contaminants make their way into the grow space. Clean the seeds with distilled water to neutralize the peroxide after soaking.
Next, drop a seed into a coco coir filled test tube using sterile tweezers. Try to get the seed as close to the center of the tube as possible but don’t worry if it’s a little off-center. You can also add a few milliliters of your nutrient solution at this stage.
Now, you can choose to tightly seal the test tubes with yeast caps or loosely seal the tubes without closing them completely. Allowing some airflow within the tubes can result in healthier seedlings, although there is a slight risk of contamination when caps aren’t fully closed. A tight seal will ensure a sterile germinating environment for your seeds but will be subject to “burping” as gasses build.
Step Five
Wrap your tubes in a layer of dense fabric or aluminum foil to control light exposure and encourage them to grow vertically. Place all test tubes in their respective tube holders.
Step Six
Finally, put your seeds under a light source and try to maintain an indoor temperature of around 78 degrees Fahrenheit. Check on your seeds daily to track their progress.
Get started with your indoor cannabis cultivation project today
Wait for Seedlings to Emerge
You’ve taken all the necessary precautions to help your precious seeds develop into healthy seedlings. It’s a painstaking but indispensable process for serious growers who want to make sure that the cost of purchasing seeds is justified with successful germination.
Now, it’s a matter of waiting for seeds to pop and seedlings to emerge. But before you transplant your seedlings into your greenhouse, you’ll need to decide which type of growing medium you’ll use.
If you haven’t decided on a growing medium for your cannabis plants yet, this stage of the growing process is your last chance. Cultivating cannabis in a traditional indoor soil substrate is a method used by many growers but hydroponic systems are also popular.
The good news is that regardless of which growing medium you prefer, you can choose almost any germination process before transferring seedlings. There’s also virtually no difference in harvesting cannabis grown in soil versus harvesting cannabis grown hydroponically.
Growing with Soil
Soil growers will need to introduce organic matter like manure or compost to their growing medium to ensure that plants are provided with sufficient nutrients. A soil-based medium can be more easily scaled to suit operations of all sizes. Soil is also the better choice for inexperienced growers who are still breaking into the industry.
Once seedlings emerge, multiple transfers may be required in soil growing. This allows plants more room to grow before they reach maturity.
Growing with Hydroponics
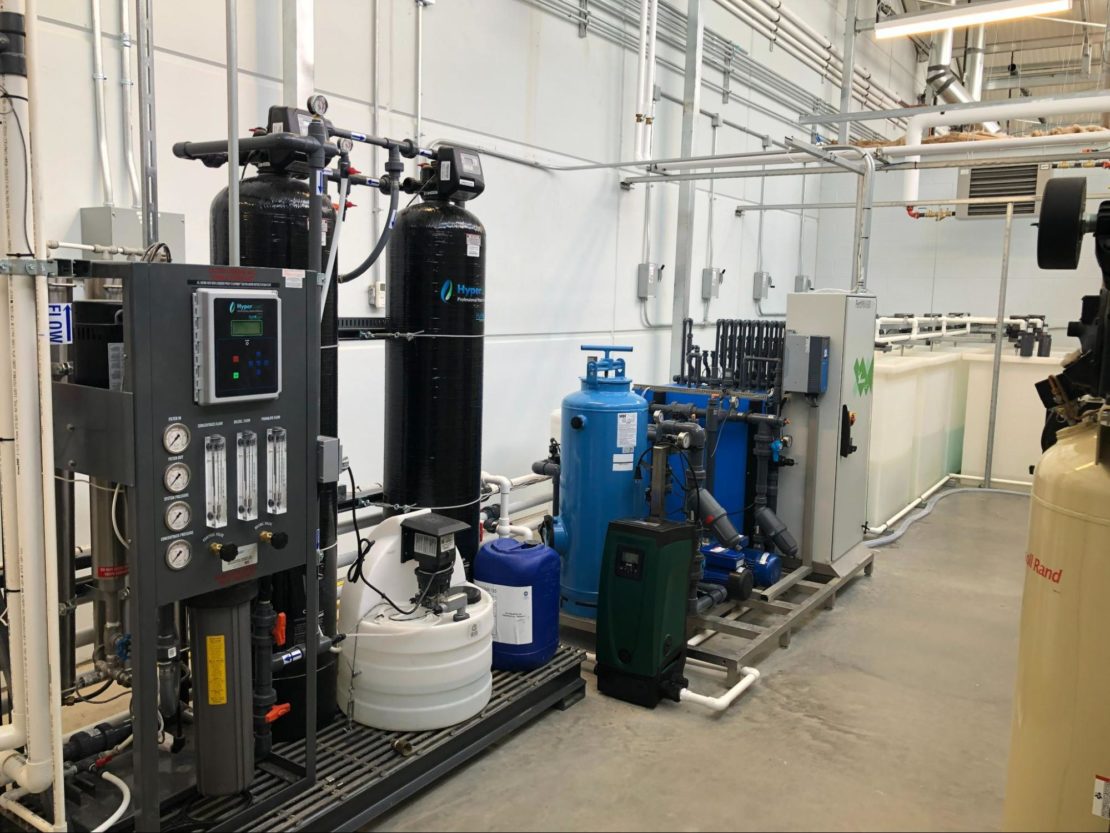
In hydroponics, plants are anchored to a single point with exposed roots dipping into a system of water, which delivers all required nutrients to the plants. These nutrients don’t occur naturally in plain water and must be added to the reservoir of the hydroponic system, which is then dispersed through pumps and pipes.
Hydroponic systems are generally best for larger growing operations. Hydroponics are generally more difficult to manage than soil growing, and some degree of experience in cannabis cultivation is needed to deliver the best yields.
Unlike soil growing, cannabis seedlings can be placed in their hydroponic containers once without the need for multiple transfers.
While each of these growing mediums requires a different approach, there are some standard growing conditions that can be expected regardless of which you choose. Relative humidity and temperature, for example, should remain constant at each stage of cannabis growth even as irrigation and lighting needs change.
Move Into the Vegetative Stage
Now that your cannabis seedlings have emerged and you’ve chosen the right growing medium for your operations, you can transfer your juvenile plants and begin the vegetative stage.
Cannabis production relies on two major stages of growth. There’s the flowering stage, which yields the THC-rich buds to be sold in dispensaries and there’s the vegetative stage in which marijuana plants grow their leaves, stalks, roots, and overall size.
The vegetative stage can be as short as three weeks or as long as three months, depending on the particular strain and your cultivation goals. Precise environmental controls are important in this stage, since the larger your plants grow, the higher the yield.
So, while an extended vegetative stage may take more time, the investment can pay dividends. The more successful vegetative growth is, the more successful the flowering stage will be, and the more bountiful the resulting harvest.
Accordingly, the amount of light, water, and nutrients cannabis plants receive in the vegetative stage will determine how well they grow. Indoor growers have the advantage of technology-backed growing systems to support their efforts.
As such, cannabis greenhouses can run lights for between 18 to 24 hours a day to skyrocket photosynthesis. Typical grow light choices for commercial cannabis growers include:
- LED
- Fluorescent Grow
- Metal Halide
- High-Pressure Sodium
- High Intensity Discharge
Temperatures should be kept slightly warmer than usual at this important growth stage, somewhere in the range of 70 to 85 degrees Fahrenheit. Ideal humidity levels should be between 40% to 70%.
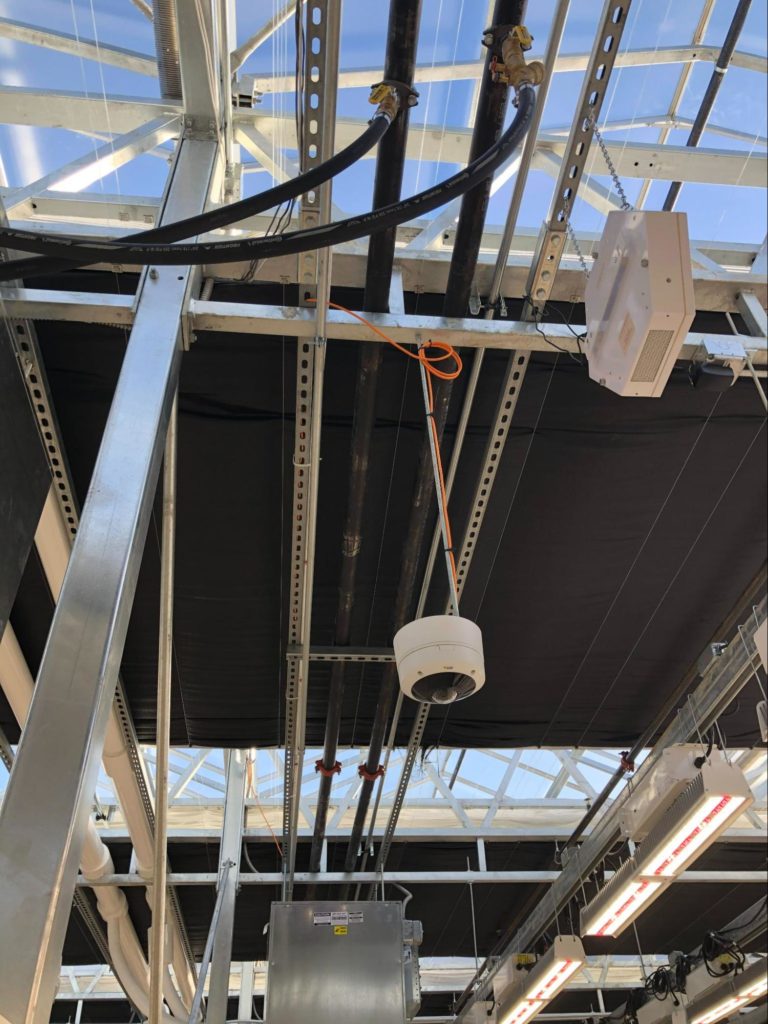
Airflow is also crucial in this stage since strong air movement will encourage strong stalks and help to control CO2 levels. Installing intake and exhaust fans in your commercial greenhouse space will help to ensure the best growing results.
Enjoy the Flowering Stage
Once the vegetative stage is complete, it’s time for your cannabis plants to bud. In the flowering stage, plants stop growing and finally develop the valuable cannabis product you’ve worked so hard to grow.
Outdoors, the flowering stage typically begins when days start to grow shorter. But for indoor cannabis growing operations, the flowering process can begin whenever the grower feels it’s time. As soon as light exposure is reduced in the greenhouse, flowering will begin.
Flowering can take anywhere from six to fourteen weeks. Indicas and autoflowering plants take the least amount of time while hybrids and sativa strains take the longest to fully flower.
On this note, the exact timeline of your flowering phase can vary tremendously depending on the particular strain.
You can expect a final growth spurt as flowering begins, and a few plants may even double in size during the first few weeks of the flowering. After this final burst, plants will stop growing in size.
You may want to introduce some training techniques in the early stages of the flowering process, namely using bamboo or wooden stakes to bend stems and optimize your cannabis canopy. This will allow maximum amounts of light to reach each branch and give buds more space to expand.
Growing conditions will need to be adjusted once plants are ready for the flowering stage. If you continue to grow cannabis under the conditions of the vegetative stage, you can’t expect your indoor plants to develop buds.
Lighting should be reduced to twelve hours a day paired with twelve hours of darkness. This may require some extra consideration in the greenhouse building process to avoid light pollution from external sources.
Temperatures can be lowered into the range of 58 to 70 degrees Fahrenheit and humidity levels can be reduced to between 40% to 50%. You’ll also need to add some flowering nutrients to your growing medium to promote high-quality buds and big yields.
In the final weeks of flowering, you may also want to flush your plants by eliminating nutrient supplements and simply feeding them pure pH-balanced water before harvest.
Flowering plants will become noticeably more robust and will start to produce a strong odor. Trichomes, or crystals, will develop over the surface of the buds and change color as flowering nears completion. The stigma, or hair-like strands that poke out of the buds, will also change color.
In fact, the two main signs that indicate your cannabis crop is ready to harvest are:
- Changing of trichomes from clear to milky-amber in color
- Changing of stigma from white to orange in color and curling of the hairs
Time for Cannabis Harvesting and Curing
It’s been months since you’ve first planted those cannabis seeds, but now, all of your hard work is about to pay off. It’s time to harvest and cure your cannabis.
While it’s certainly easier to harvest cannabis than to grow cannabis, there are still some important considerations to take into account before cutting your plants.
Some supplies you’ll need for harvesting and curing include:
- Loupe Magnifier
- PVC Cutter
- Pruning Shears
- Digital Moisture Meter
- Tight-Sealing Mason Jars
The overall frequency of harvesting is up to you. You could opt to streamline your growing operations for the fastest turnover or invest in a longer grow for a higher yield. The more frequently you harvest, the more often you’ll have to trim and cure.
To start the harvest, grab your preferred cutting tool and start removing the branches of your cannabis plants. Take care with the buds, ensuring that no material is accidentally lost, including trichomes.
Once branches have been pruned from their mother plants, you can choose from two trimming options.
Dry Trimming
As the name implies, dry trimming involves removing cannabis branches and hanging them out to dry for several days. After the buds have dried, leaves, stalks, and other unwanted plant material can be trimmed away.
Wet Trimming
Wet trimming is the process of trimming cannabis buds as soon as the branches are removed from the plant. This method can be messier but typically is more time-efficient.
Once your bud has been neatly trimmed, it’s time for the final step of the cannabis growing process.
Proper drying and curing is an essential step in cannabis production. This last phase helps characteristic flavors to emerge from the buds while getting rid of any grassy tastes. It also makes the product more manageable and less messy.
Drying
Drying cannabis can take anywhere from two to seven days, depending on the trimming method. Wet trimming can reduce drying times since a portion of the plant material has already been trimmed away. Dry trimming depends on complete drying of all plant material and takes longer.
Drying times can vary but the rule of thumb is to check the stems. If stems snap, buds should be fully dry and ready to cure. There are a few cannabis drying options to consider:
- Wet trimming will require a flat drying rack
- Dry trimming will require a hanging line to dry branches upside down
For commercial cannabis operations, it’s a good idea to set aside a dedicated drying room. The space should be dark with constant air circulation. Temperatures should be around 60 to 70 degrees Fahrenheit with between 55% to 65% humidity.
Curing
After drying and trimming is done, you can move on to the very last step of the indoor cannabis growing process.
Curing involves placing dried buds in airtight containers to control moisture loss and preserve characteristic flavors. Curing can take anywhere from a few weeks to a month and depends on stable temperature and humidity for the best results.
When you cure your cannabis, you’re helping to ensure its shelf life. A proper cure prevents loss of valuable THC, CBD, and terpenes, in addition to preventing mold and mildew. Simply put, a good cure results in a good smoke.
To cure your buds, loosely place them in an airtight container like a large mason jar, taking care not to crush or compact them. Store in a cool, dark, dry room. Check the humidity with your containers and make sure it’s between 55% and 65%. You’ll also want to be sure to regularly burp your jars to release moisture.
FAQ
Is a custom cannabis greenhouse worth it?
For serious growers who want the best results from their cultivation efforts, a custom cannabis greenhouse is completely worth it. Rather than renovating an existing space to grow cannabis, you can create a controlled environment commercial facility made to your exact specifications.